
Printing barcodes and request forms
Collect samples and print a barcode label for each tube, plus the request form.
Every tube needs a Clinilabs barcode label printed from the portal. The barcode links the tube to the patient and their tests, so we can process it as soon as it arrives.
Straight after ordering
When you confirm an order, its Bill Receipt opens. It lists each sample needed, with its accession number and sample type. The coloured dot shows the tube's cap colour.
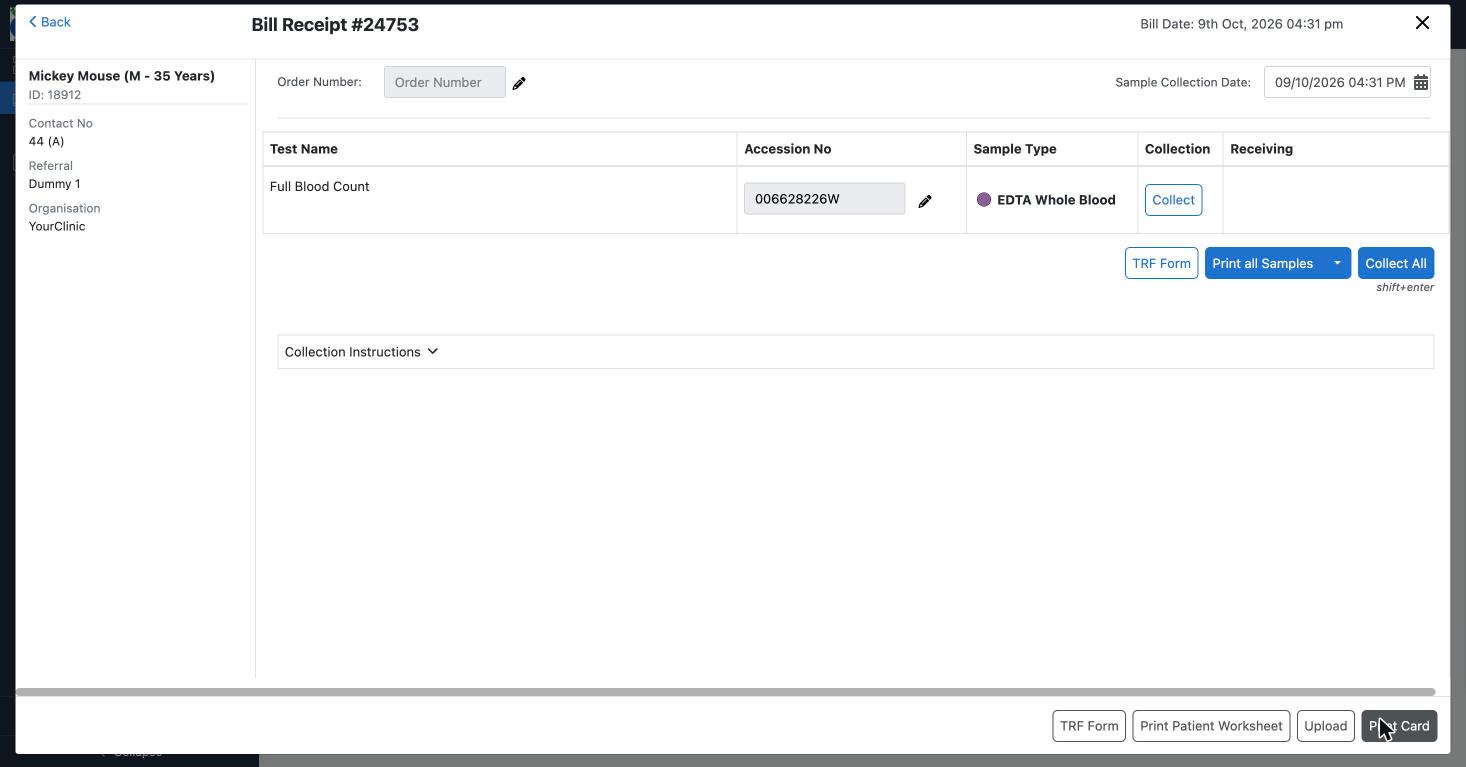
- Open Collection Instructions to see which tube to use for each sample, for example "EDTA Whole blood bottle. Usually purple top".
- Take the samples, then select Collect on each sample's row (or Collect All). The row changes to Collected.
- Select Print all Samples to print a barcode label for each tube. Use the ▾ next to it to print just one sample type.
- Select TRF Form to print the request form.
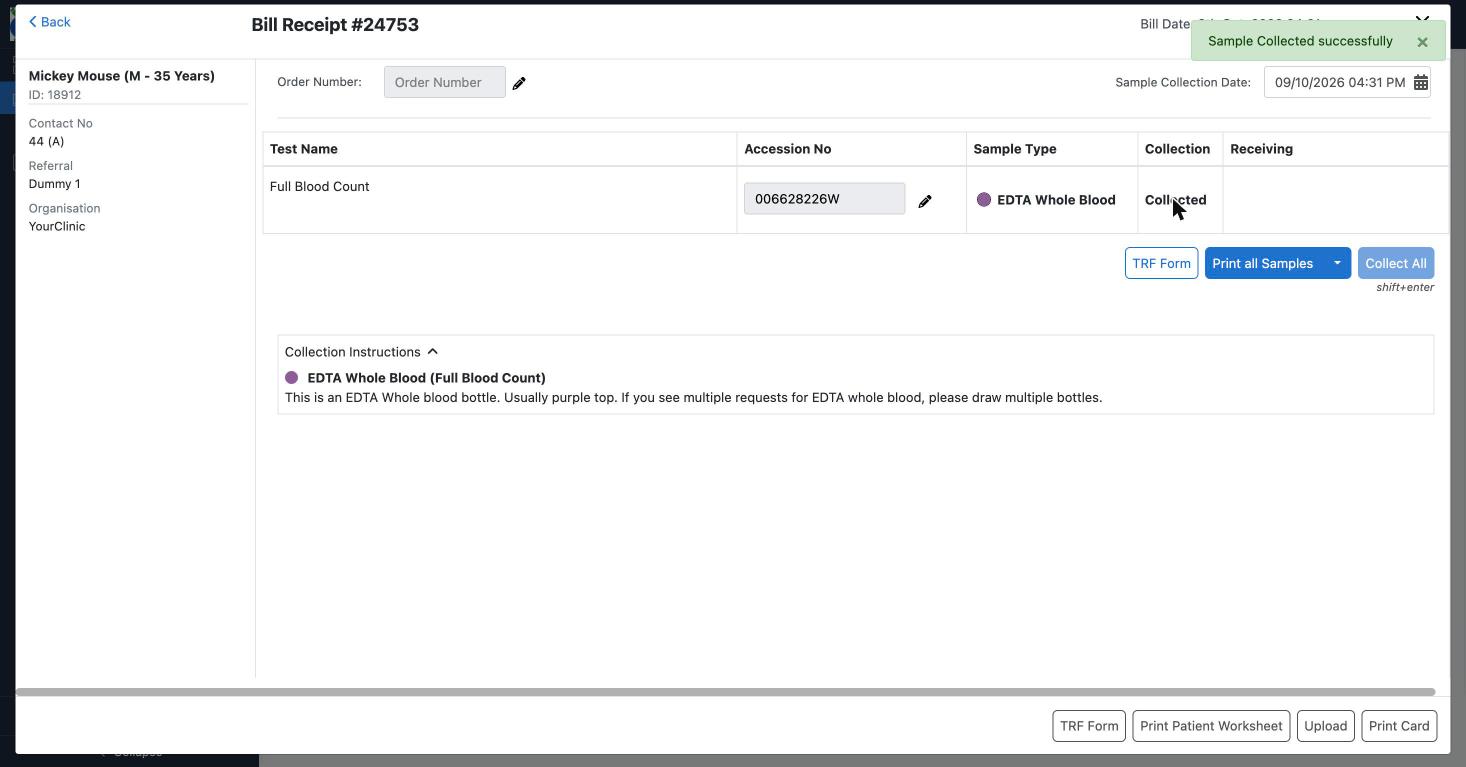
Later, or for samples taken another time
- In the menu, select Sample Accession, then Pending Collection. This lists samples you've ordered that haven't been collected yet.
- View them Sample Wise (one row per tube), Bill Wise (one row per order) or Emergency (urgent orders only).
- Select Collect on a sample's row, or tick several and use Collect And Print All.
Collected samples move to Pending Accession, then to Accessed once they're received. You don't need to select Receive: the lab does this when your samples arrive.
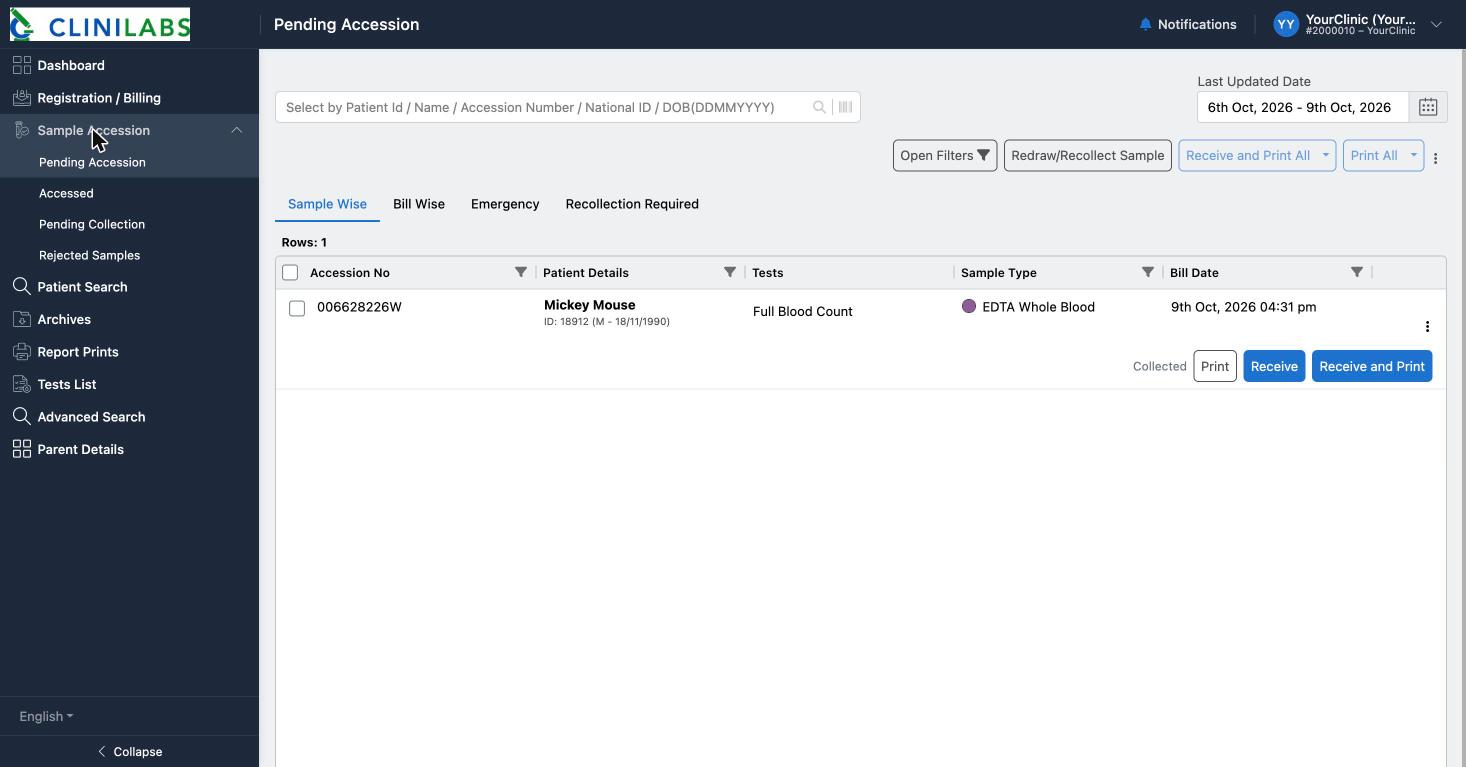
Selecting a sample's row opens its details, where you can see its tests and collection instructions, add comments, and print the request form.
Reprinting a label or the request form
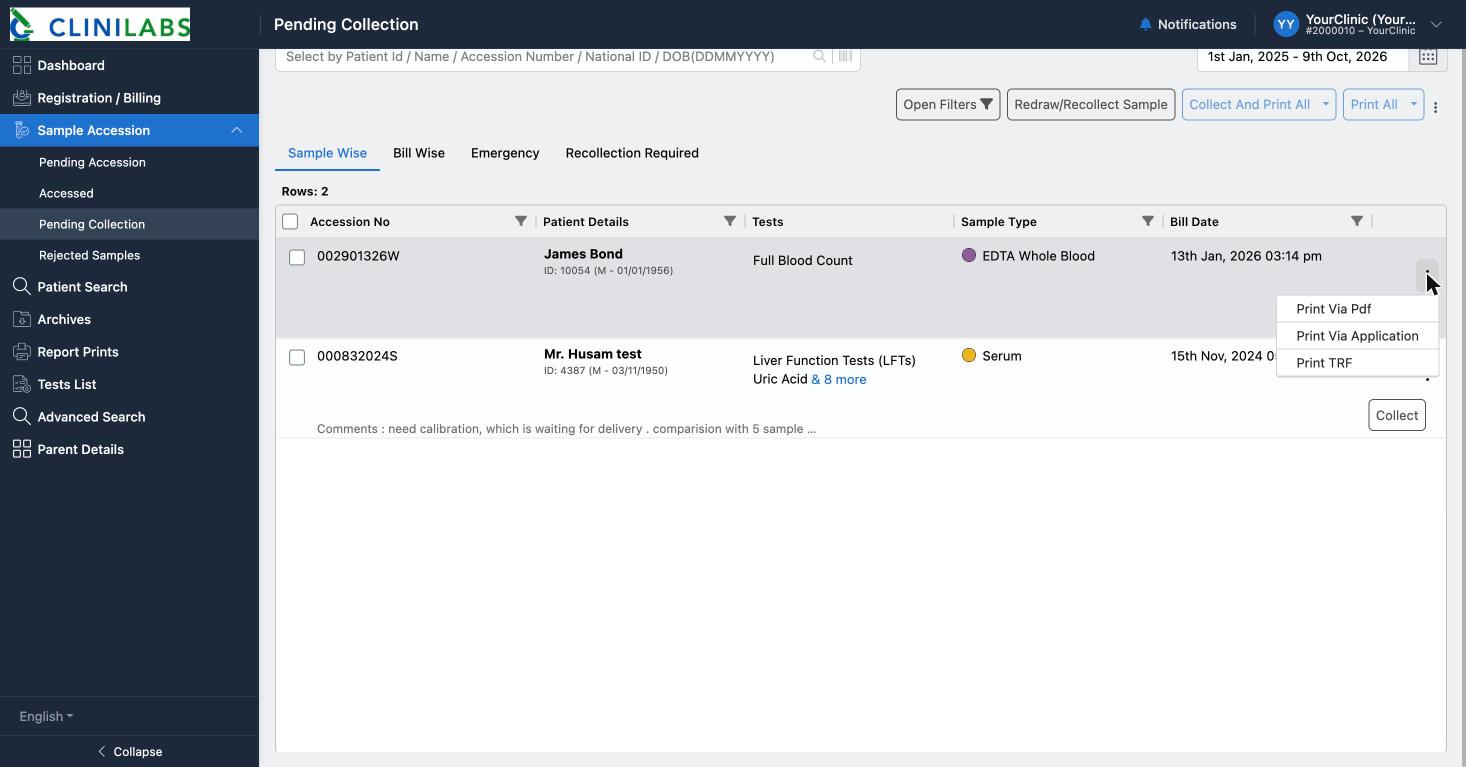
Select the ⋮ on a sample's row:
| Option | What it does |
|---|---|
| Print Via Pdf | Opens the barcode label as a PDF to print on any printer |
| Print Via Application | Prints straight to a label printer set up with the Crelio print app |
| Print TRF | Prints the request form (TRF) for the order |
If you won't be collecting a sample after all, contact us and we'll cancel it.
Label printers
Barcode labels print best on a dedicated label printer. Labels printed on ordinary paper and taped on can jam our analysers and delay results. We recommend a Zebra label printer with 50 × 25 mm labels.
Sticking the label on
- Stick the label lengthways, straight along the tube, close to the cap.
- Leave a strip of the tube clear, so we can see the sample.
- Cover the manufacturer's label, but don't wrap the barcode round on itself.
- Label tubes after taking the blood, at the patient's side, so tubes can't get mixed up.
Request form
Print a request form for every order and put it in the outer pocket of the sample bag, not inside with the tubes. See Packaging samples.